Chilli Planting Workshop at Landsec’s Cardinal Place Estate - 22nd April 2026

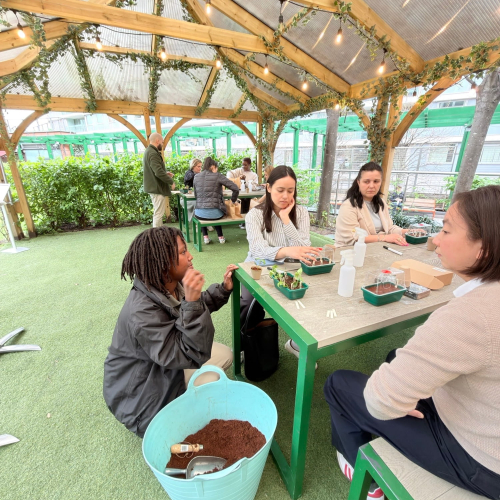
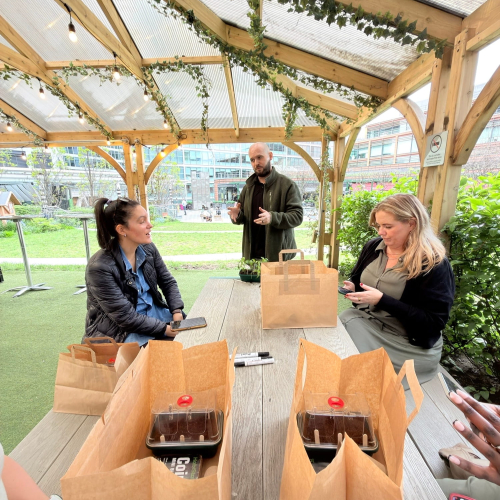
Our Urban Gardening team Jack and Marcia ran the first Chilli Planting Workshop for our client Landsec in Victoria this month and it was a huge hit!
Open to tenants and employees, we had a brilliant group of 15 come along from different offices.
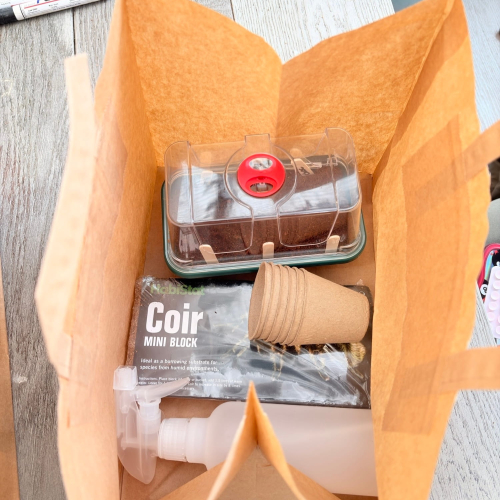
Held in a lunch hour on the Winter Garden Terrace, everyone got their own compact chilli growing kit, including a mini propagator dome, spray bottle, six recyclable pots and a Coco Coir compost block.
Coco coir - made from coconut husk - is a sustainable and lightweight growing medium that expands when rehydrated, making it the perfect soil alternative for easy transport and home growing. An increasingly popular substitute for traditional compost in large-scale gardening and agriculture because it’s a natural resource and great for retaining water.
Once everyone was settled, it was time to choose their chilli seeds.
Each person got to pick six chilli varieties out of fifteen: ranging from the mild-mannered Padrón peppers to the smoking-hot chocolate habanero.
Jack demonstrated the full process, from sowing seeds and maintaining humidity to pricking out seedlings and potting on as they grow.
The feedback has been brilliant, with one participant already reporting their first seedlings emerging just days after the workshop. It’s been great to see such enthusiasm, and we hope to run more sessions across other locations in due course.
We’ll keep you informed of workshop dates.

Top Tips for Growing Chillies at Home 🌱
If you joined us - or are inspired to try growing your own - here are some key tips to get the best results:
Warmth and light
Place your propagator in a bright spot, like a windowsill. Chillies thrive in warmth, ideally between 20–25°C (28°C is optimal for germination).
Be patient
Seeds can take 1–3 weeks to germinate, depending on warmth, light and humidity.
Keep moisture balanced
Use your new spray bottle to keep the compost lightly moist - avoid overwatering.
Maintain humidity
Keep the propagator closed until your seedlings develop their first true leaves, then gradually open it up. Once you see leaves you can open your propagator fully (with the lid still on!)
Potting on
Once seedlings have grown a few sets of leaves, remove the propagator lid, rehydrate the coco coir block and transplant each seedling into the 6 larger pots. After 2-3 weeks (feed and water regularly) transplant into final pots. Think about the size – will they fit on the windowsill - and what material you prefer. We recommend 5L, you’ll just need to buy some extra coco coir (each block is roughly 4.5L when hydrated).
Feeding
Once your seedlings are established in the new pots you can start feeding them lightly with seaweed extract or an organic liquid fertiliser (we suggest half recommended strength), increasing to full strength as the plant grows and begins to flower.
Outdoor growing
Chillies can thrive outside in a sheltered, sunny spot with at least 6 hours of sunlight. A balcony corner is ideal.
Advanced Tips
For those keen to take things further:
- Use a heat mat to maintain optimal germination temperatures and speed up growth, you can buy them online and set your controller to a Chillie’s favourite germination temperature (28C) to optimise growth.
- Add rooting powder or mycorrhizal fungi when transplanting to support strong root development
- Feed with a seaweed-based fertiliser such as Maxicrop for best results
If you joined us, we’d love to hear how your chillies are getting on — and if you missed it, keep an eye out for future workshops coming soon.
Happy growing!
